 Creating Icons
for Downloaded Files
Creating Icons
for Downloaded FilesOnce you have unzipped or run your downloaded file, then you will want to create a way to access this program. By creating a Windows icon is probably the easiest way.
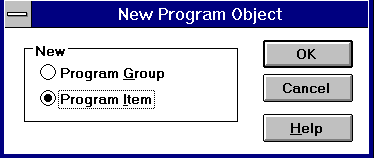 Select Program Group and click OK.
 Select an appropriate name for the program group, leave
Group File blank, and click OK.
Now, to create the icon itself, go back to the File menu again, choose New, Program Item and click OK.
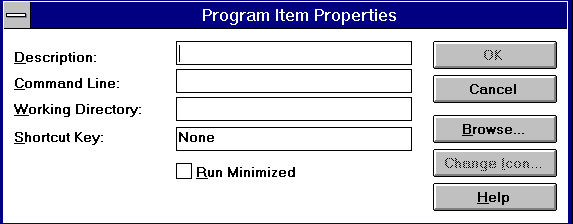
Click OK to save all your changes. You will now see a new program group with your new icon in it.
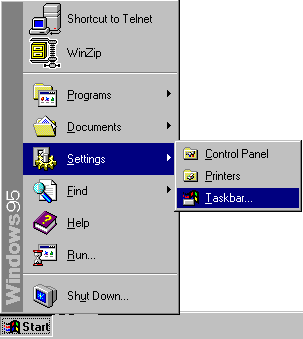 To create a listing in Program Files, click on Start, go to
Settings, and choose Taskbar.
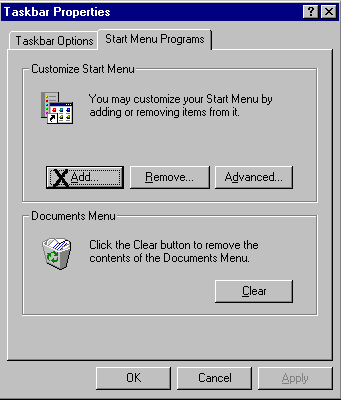 You will see two tabs. Click on Start Menu Programs, and
then ADD.
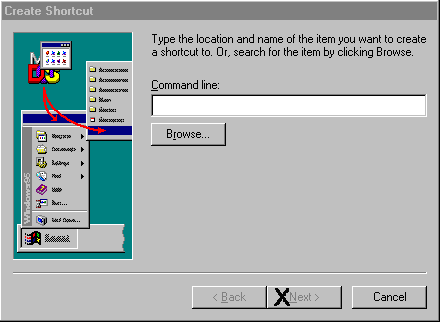 You will be asked to provide the path to the file that you want to
execute. Input the path and executable file name (use the Browse
button if you wish), then click NEXT.
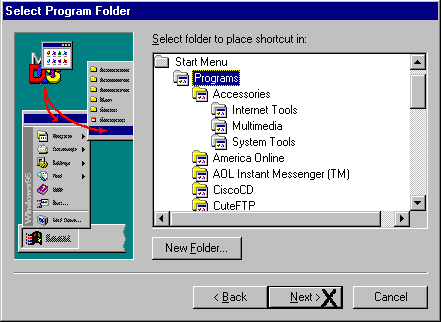 Select the file folder where the listing is to be placed. If you want,
create a new folder for it. Click NEXT.
Choose an appropriate name for the new program and enter it. Click NEXT.
You will be asked to choose an icon for the program. Choose an icon, and click FINISH (if Windows finds an icon with your program, this step will be skipped).
To create an icon, or shortcut, on your screen:
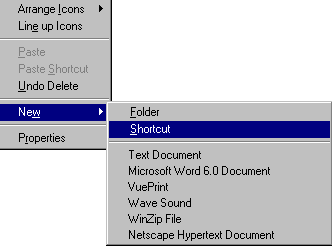 Click your RIGHT mouse button anywhere on your desktop screen. A
menu will appear. Click NEW then SHORTCUT.
You will be asked for the path for the executable file. Input the path and file name, and click NEXT.
Enter the name of the icon, and click FINISH.